Cloudcraft customers have shared how important it is for them to be able to easily troubleshoot and collaborate on a singular application or single team’s resources within their complex infrastructure.
That’s why we’re thrilled to introduce Cloudcraft’s new filtering UI feature.
The New Filtering Experience
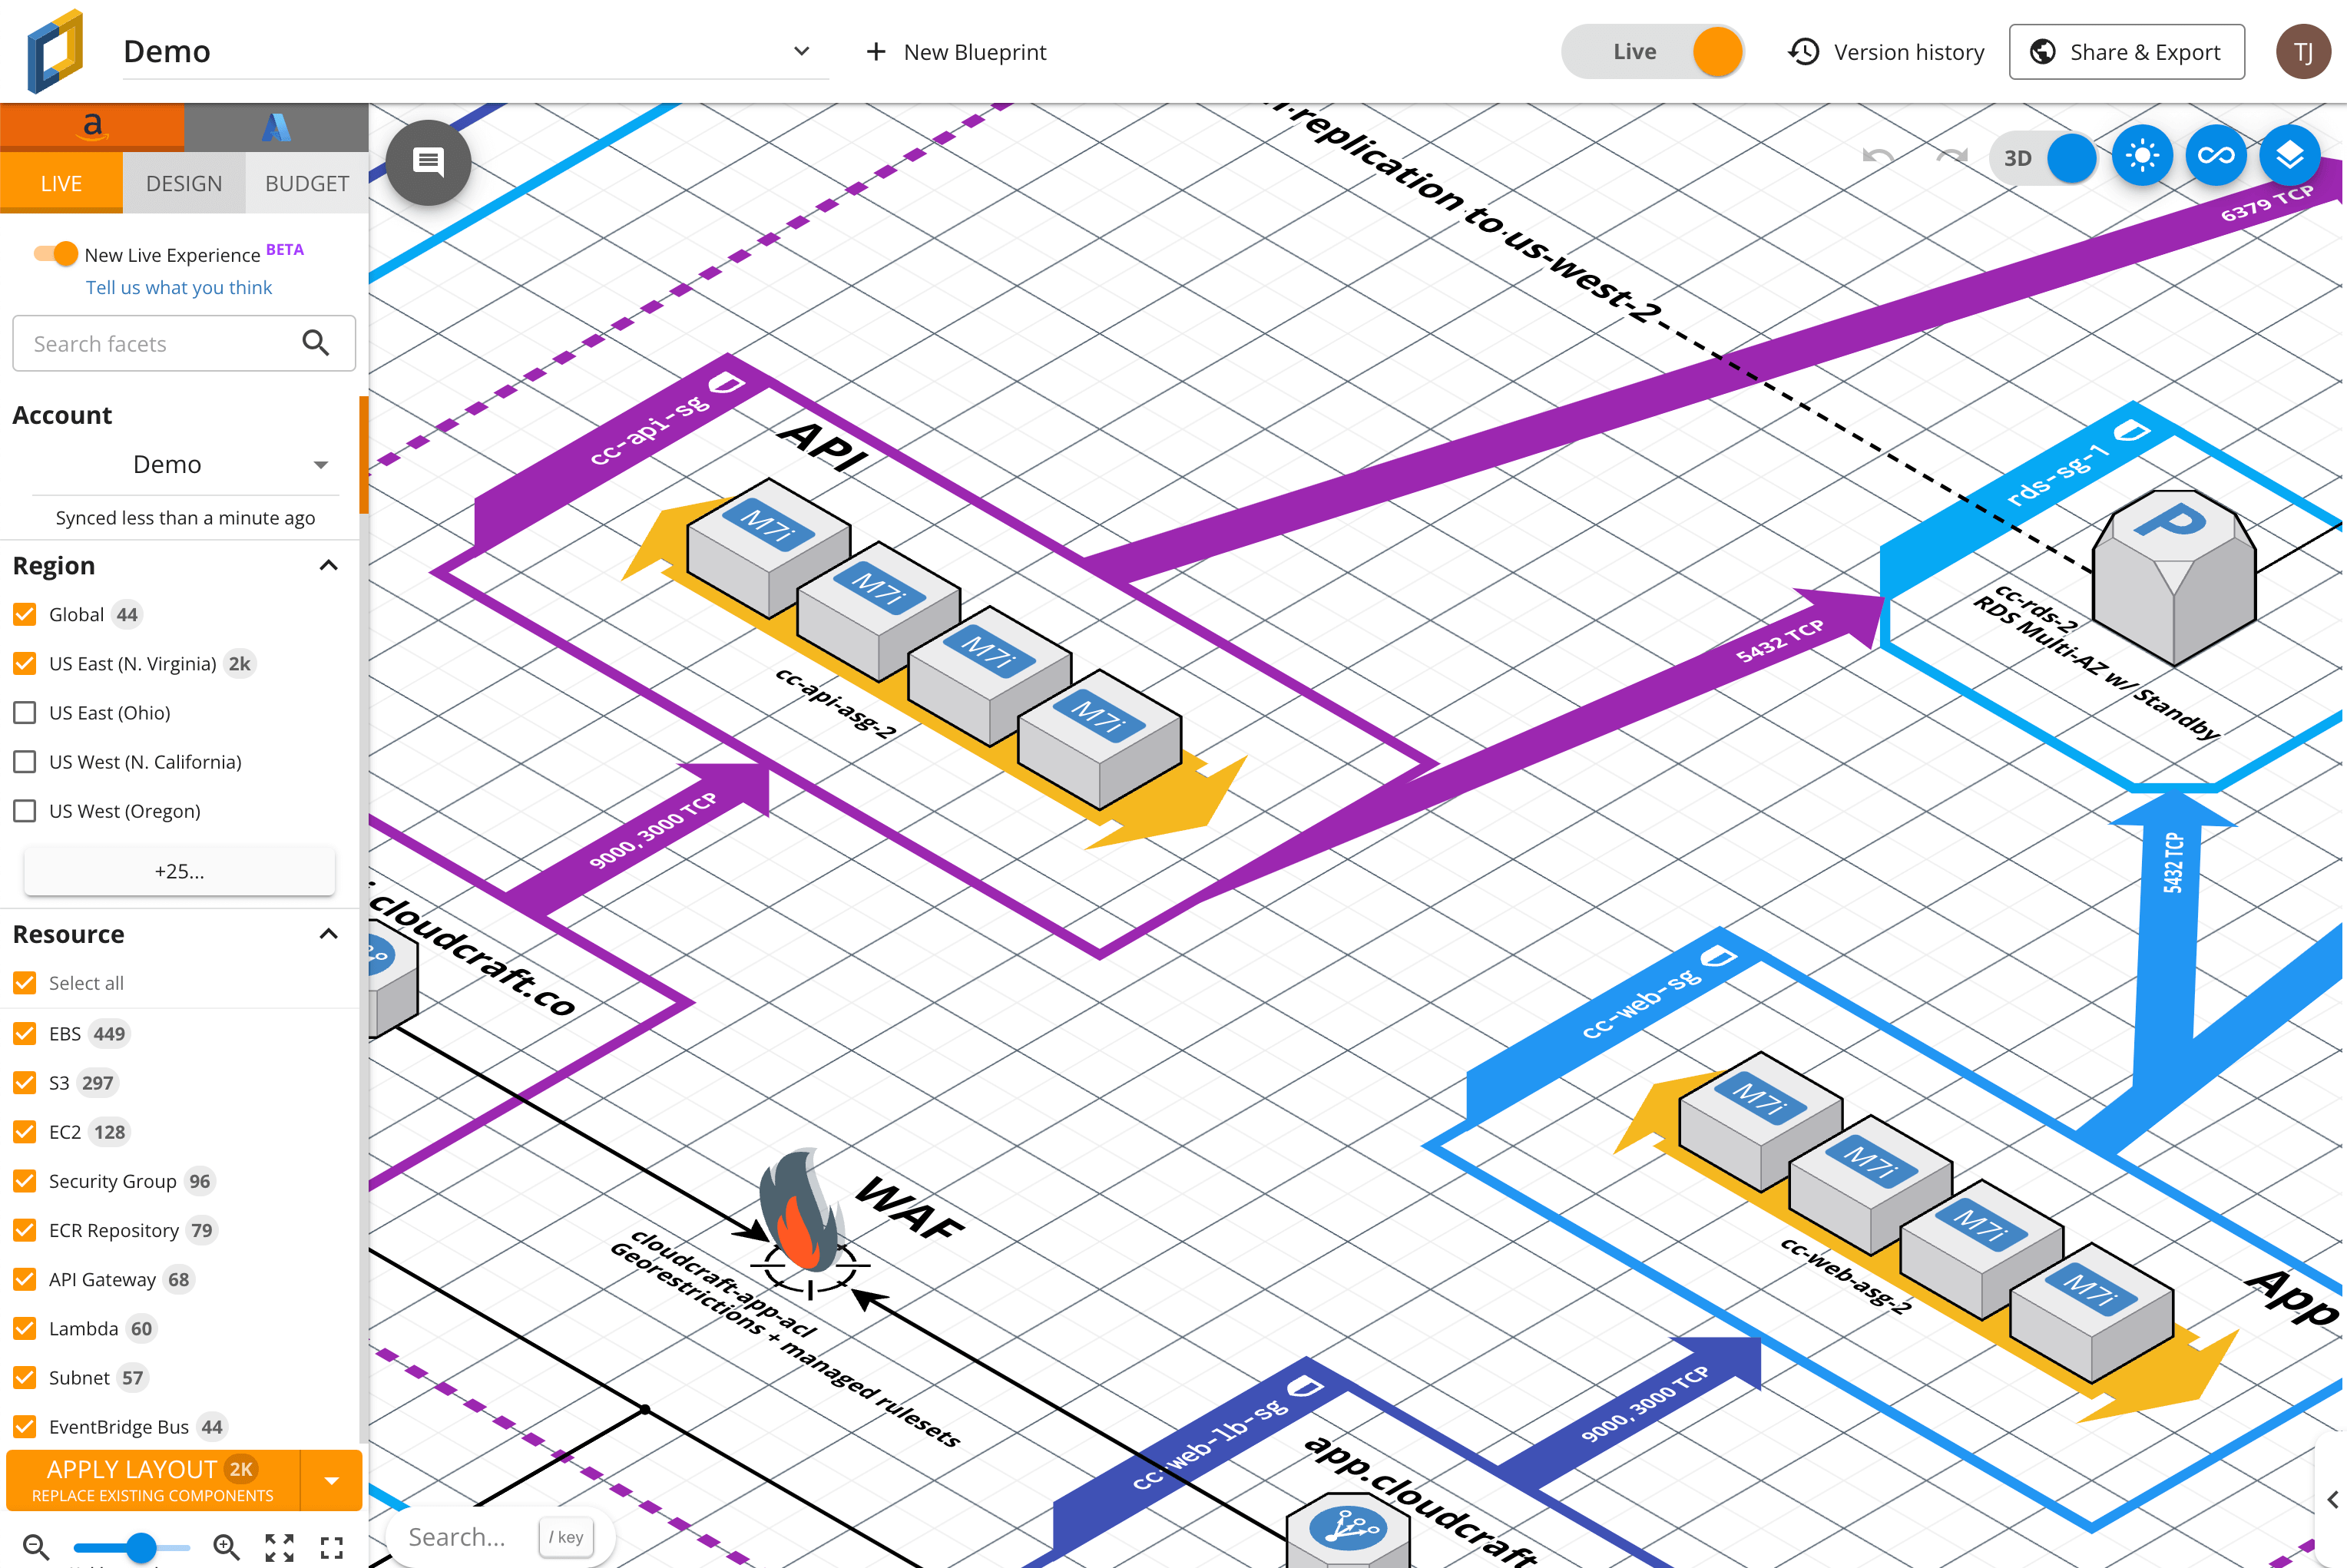
Say hello to clarity with our enhanced filter UI. We’ve made it easier than ever to zero in on the resources and infrastructure assets that demand your attention.
With intuitive filtering options at your fingertips, you’ll have a crystal-clear view of your architecture, allowing for efficient troubleshooting and strategic decision-making. Simply select the regions you want to scan, and you’ll see a complete list of the tags on the resources in those regions.

For example, if you have tags like application=webserver and application=database, you can select them from the list of tags, and Cloudcraft will filter to show a diagram with only those resources.
You can further filter to exclude resource types that are not of interest, so that for example you can remove S3 buckets or EBS volumes from a diagram to reduce clutter.
This first-class UI experience makes it very easy to quickly select the resources of your choice from the live scan of your infrastructure.
A major use case for this feature is that you can now create a cross-region view of your resources much more easily, simply by selecting multiple regions at once in the filter panel.
The tags list also includes sections for AWS-, Azure-, and Kubernetes-specific tags, so you can use these to filter your diagram as well.
Cloudcraft is excited to receive customer feedback so once you’ve given this new UI a try, please share your feedback with us here. Our product management team will use your input as we add more features and UI improvements to Cloudcraft.
How to get started
In your Cloudcraft diagram, you can now turn on the toggle that states New Live Experience BETA in the Live tab in the left-side navigation bar. This will allow you to select any region, resource type, or tag.
You can then add it to or remove it from the diagram. Once you make your selections, just click Apply Layout at the bottom of the panel and your diagram will update. It’s that simple.
Haven’t used Live Scanning before? Want to invite colleagues to collaborate and share your infrastructure diagrams? Here’s how:
How to get started with Live Scanning in Cloudcraft
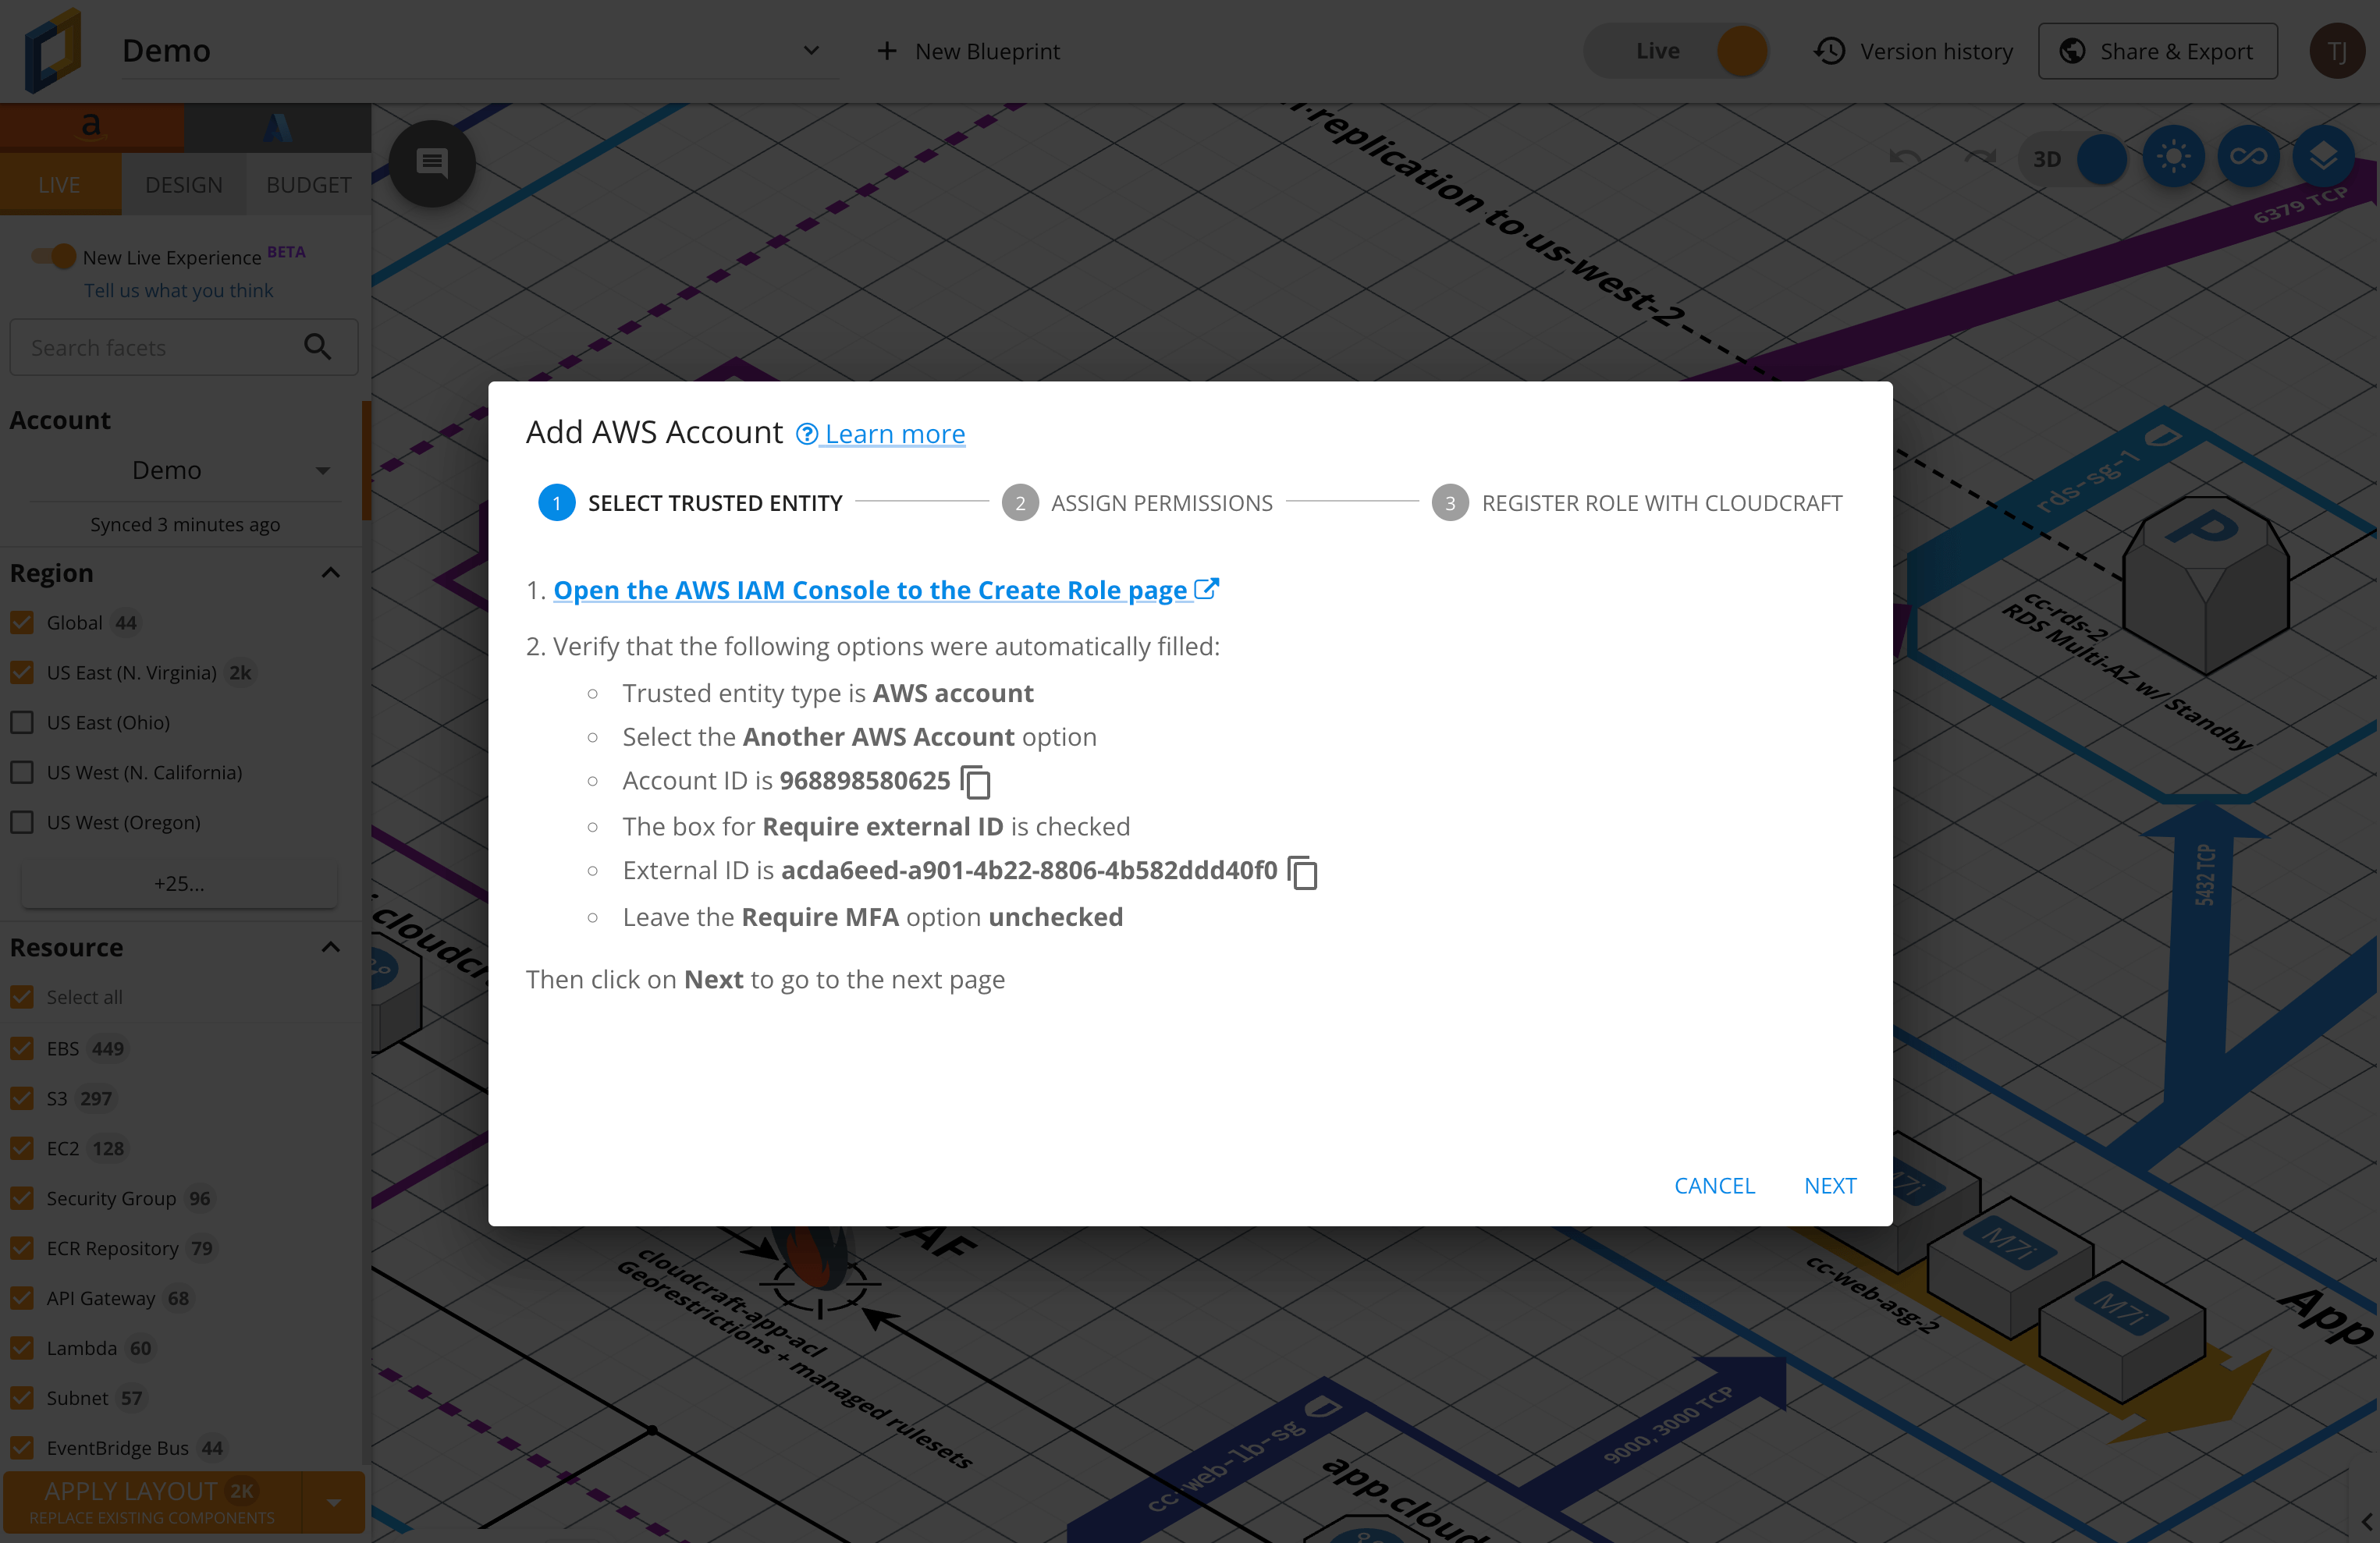
Seamlessly connect your AWS or Azure environment to Cloudcraft for comprehensive visibility. You can do this by selecting the cloud provider of your choice (‘AWS Accounts’ or ‘Azure Accounts’) from the top right corner menu, then follow the step-by-step instructions.

How to Invite and Collaborate with Teammates in Cloudcraft
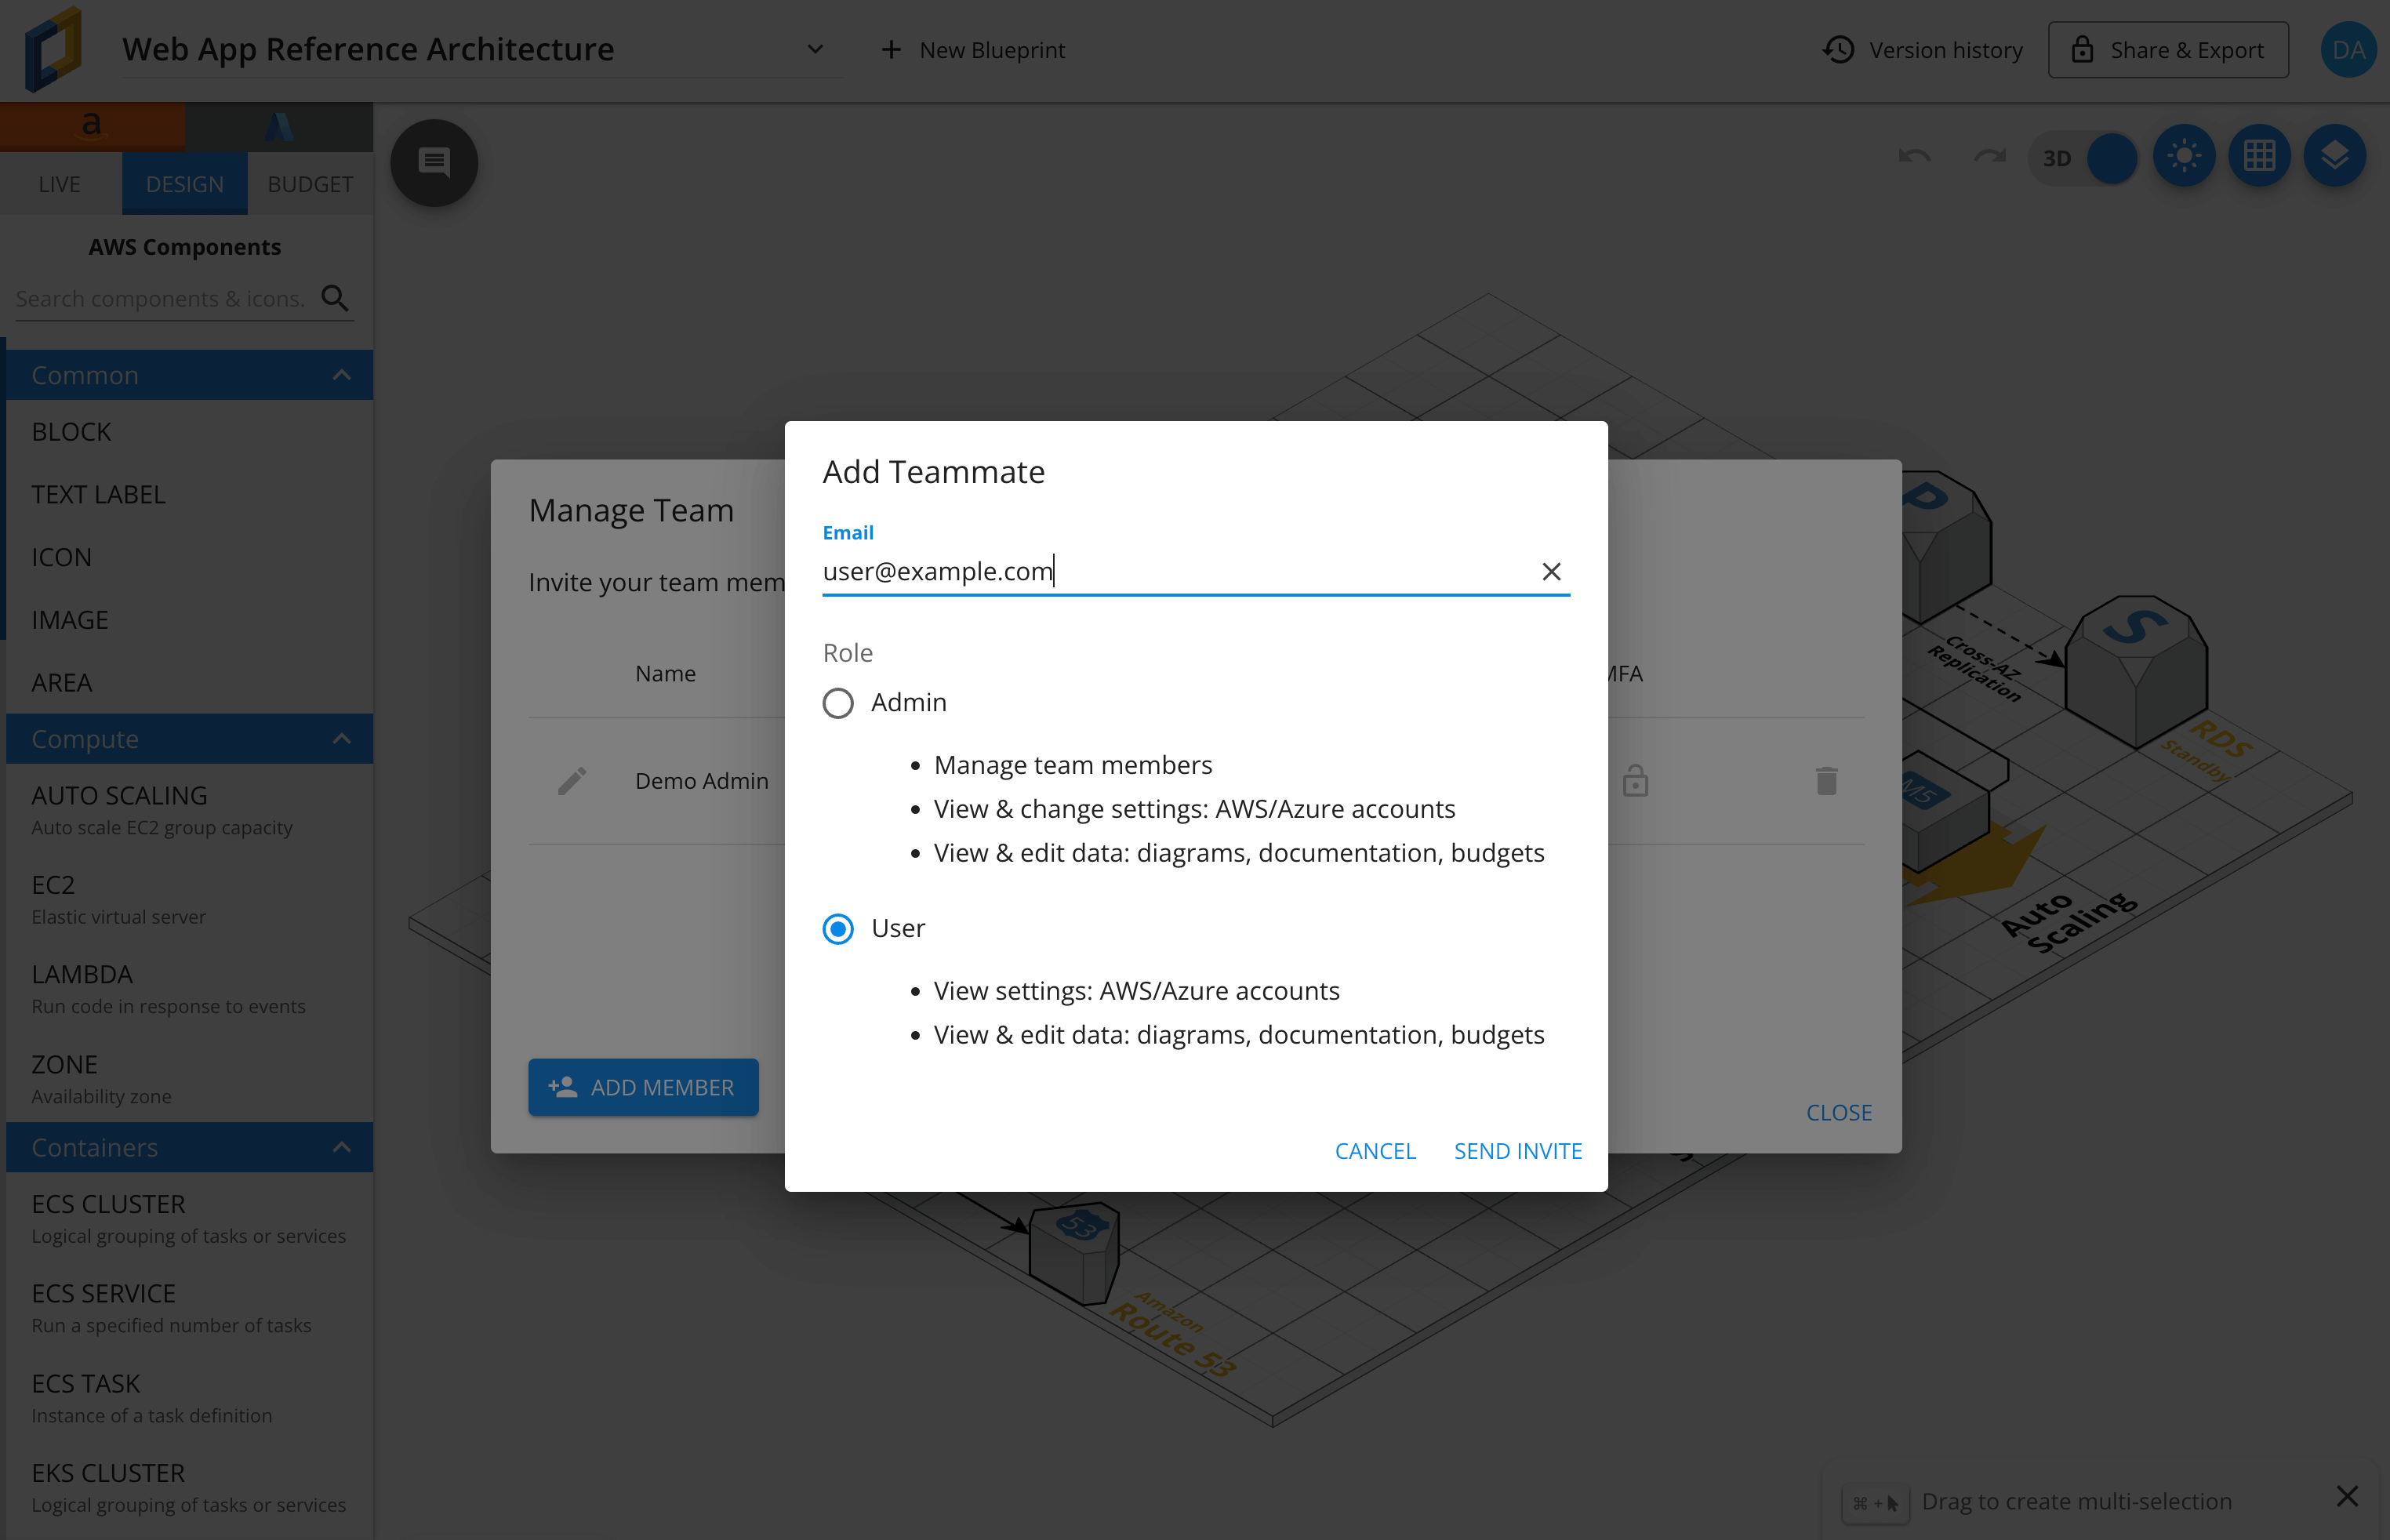
You can empower your team by assigning permissions and inviting collaborators to join your projects. In order to invite users, head to User then Team settings in the top right corner of the Cloudcraft dashboard.
Next, click the blue Add member button at the bottom of the Manage Team window that appeared. After clicking the button, you need to enter the user’s email address and select a role for them on your team.

Selecting the correct role is a critical step in this process, as different roles have different levels of access. Select the role that best fits this user, but try to follow the principle of least privilege.
In case a user does make a mistake in your architecture, you’re always able to use the Version History feature of Cloudcraft to revert back to previous versions of your architecture.
Lastly, click the Send invite button to invite the user to your team. The user you invited will receive an email that includes a link to join your team and set up their account if they have not already.
Ready to experience the power of Cloudcraft for yourself? Start your 14-day free trial today and unlock a new era of simplicity in infrastructure diagramming.
